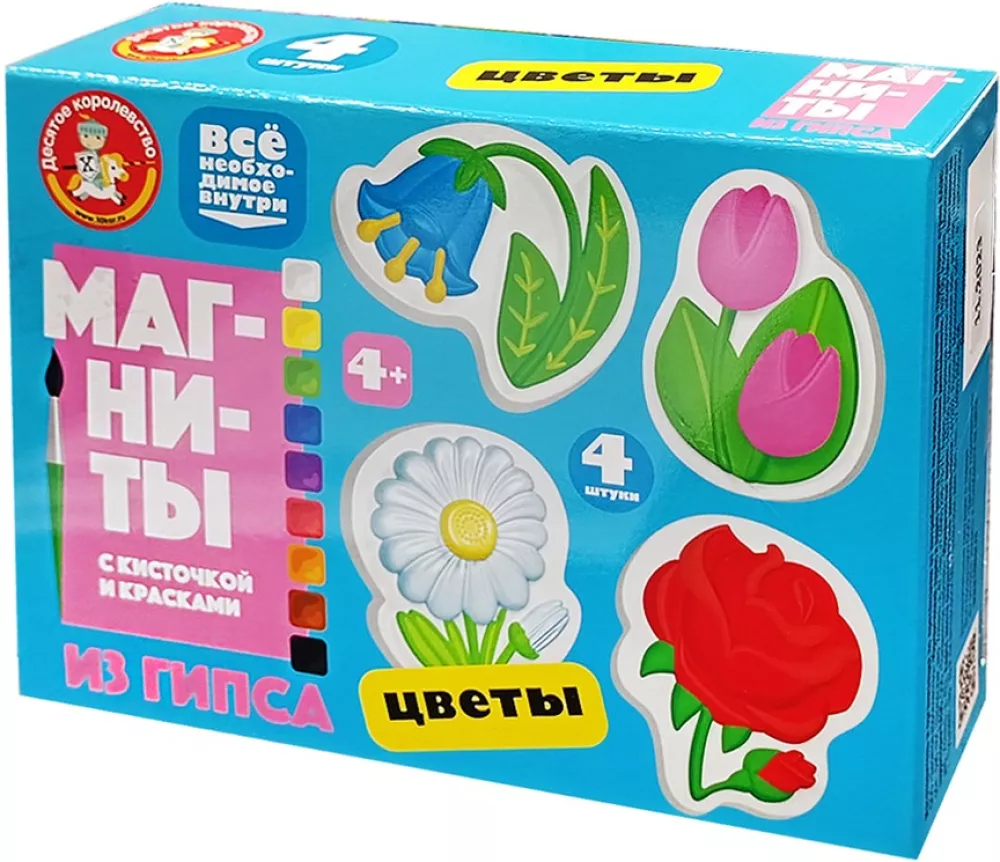
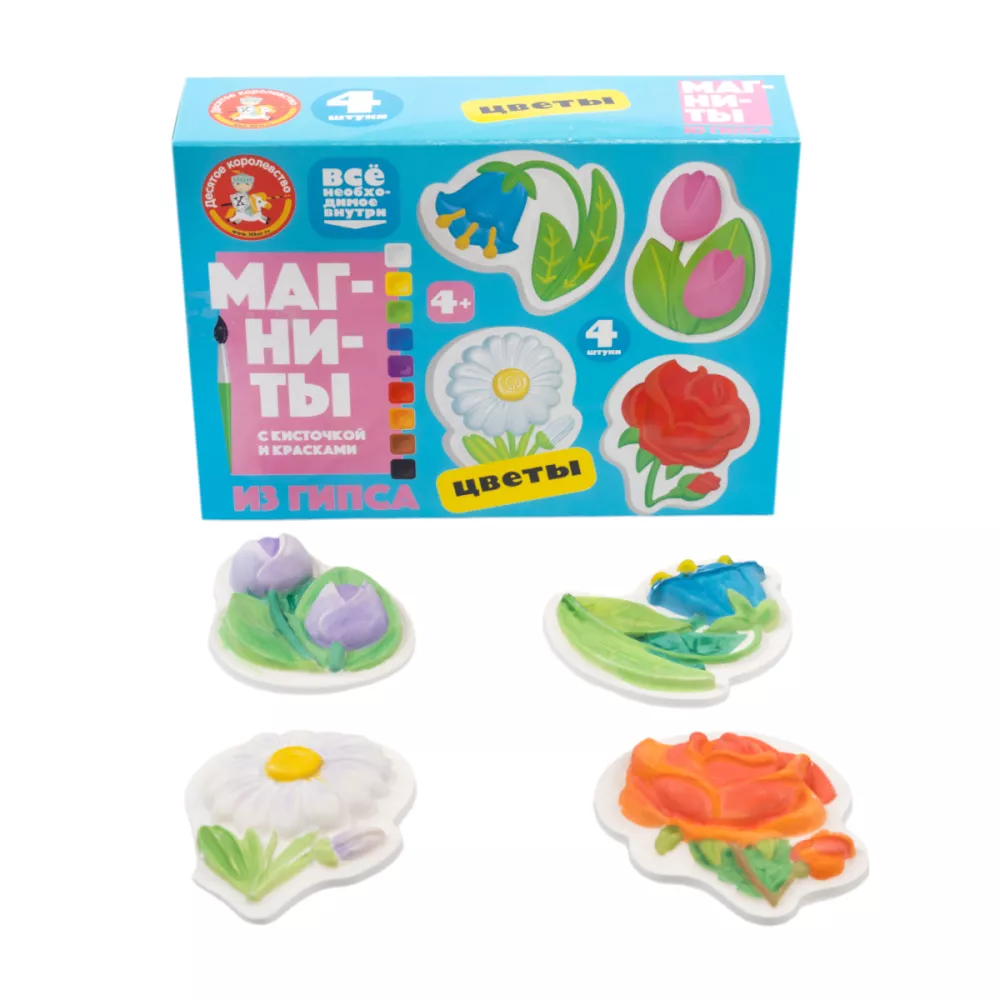
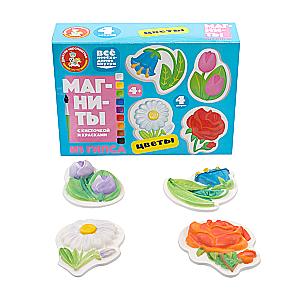
Plaster Magnets for Painting - Flowers
With the plaster magnet making set «Flowers», you can create magnets with spring motifs by hand.
By following the step-by-step instructions, create original gifts for your loved ones.
Set composition:
• plaster – 1 pack (150 grams)
• casting molds (size of each... element about 5x7.5 cm) – 4 pcs.
• watercolor paints – 9 colors
• brush – 1 pc.
• magnetic tape for attaching figures to a metal surface
• instruction
The set is intended for children over 4 years old.
How to play?
Help the child mix and pour the solution into the molds, as well as paint the finished figures.
You will need a comfortable workspace, which is best covered with newspaper or a plastic tablecloth. It is better to work in an apron or old clothes to avoid getting dirty.
Prepare a container to mix the plaster solution. This can be a disposable cup, a yogurt cup, or any other container that you won't mind throwing away later.
Attention! It is forbidden to pour liquid plaster down the drain!
STEP 1. Set the mold.
First, you need to place the plastic mold in a horizontal position. You can take the box from the set, carefully cut a hole in it with scissors slightly larger than the protruding part of the mold, and place the mold in this hole. Another option is to use some container (jar, bowl, etc.) whose size matches the size of the protruding part of the mold.
STEP 2. Make the solution.
To do this, pour water into the prepared container and gradually add plaster while constantly stirring with a spoon or stick. Mix the plaster to the consistency of liquid sour cream in a ratio of 3:2, i.e. 3 parts plaster and 2 parts water. Note that plaster sets quickly, within 10 minutes, so you need to pour the prepared solution into the molds immediately.
TIP. Decide how many figures you want to create before starting work. If only one, use 1/4 of the plaster powder. If you plan to fill all the molds, you need to use all the powder in the recommended proportion.
STEP 3. Pour the mold.
Carefully pour the solution into the plastic mold. To ensure that there are no empty spaces in the mold and the solution fills the entire container evenly, you need to shake the mold slightly. Remove excess solution to make the surface of the casting as flat as possible.
STEP 4. Remove the casting from the mold.
After about 40 minutes, you can remove the casting. To do this, gently stretch the mold at the edges and then, turning it over, remove the mold from the casting. If the figure does not come out, gently tap the mold against your palm. The casting should be smooth and sturdy.
STEP 5. Paint the figure.
Now comes the most interesting part – painting! You can start this 2–3 hours after casting the figure. However, it is better to be patient and do this the next day, allowing the plaster to dry completely.
TIP. As a final touch, you can apply a thin layer of clear varnish to the painted figures.
STEP 6. Attach the magnets.
Now you can attach the magnets to the figures. The set includes magnetic tape with an adhesive layer protected by paper. For convenience, the magnetic tape is already divided into squares. The number of squares per figure is 6–8. If the figure does not hold well enough, you can stick a second layer of magnetic squares.
TIP. To ensure that the magnet adheres better to the plaster figure, it is recommended to cover the back of the figure with varnish or PVA glue and let it dry.
By following the step-by-step instructions, create original gifts for your loved ones.
Set composition:
• plaster – 1 pack (150 grams)
• casting molds (size of each... element about 5x7.5 cm) – 4 pcs.
• watercolor paints – 9 colors
• brush – 1 pc.
• magnetic tape for attaching figures to a metal surface
• instruction
The set is intended for children over 4 years old.
How to play?
Help the child mix and pour the solution into the molds, as well as paint the finished figures.
You will need a comfortable workspace, which is best covered with newspaper or a plastic tablecloth. It is better to work in an apron or old clothes to avoid getting dirty.
Prepare a container to mix the plaster solution. This can be a disposable cup, a yogurt cup, or any other container that you won't mind throwing away later.
Attention! It is forbidden to pour liquid plaster down the drain!
STEP 1. Set the mold.
First, you need to place the plastic mold in a horizontal position. You can take the box from the set, carefully cut a hole in it with scissors slightly larger than the protruding part of the mold, and place the mold in this hole. Another option is to use some container (jar, bowl, etc.) whose size matches the size of the protruding part of the mold.
STEP 2. Make the solution.
To do this, pour water into the prepared container and gradually add plaster while constantly stirring with a spoon or stick. Mix the plaster to the consistency of liquid sour cream in a ratio of 3:2, i.e. 3 parts plaster and 2 parts water. Note that plaster sets quickly, within 10 minutes, so you need to pour the prepared solution into the molds immediately.
TIP. Decide how many figures you want to create before starting work. If only one, use 1/4 of the plaster powder. If you plan to fill all the molds, you need to use all the powder in the recommended proportion.
STEP 3. Pour the mold.
Carefully pour the solution into the plastic mold. To ensure that there are no empty spaces in the mold and the solution fills the entire container evenly, you need to shake the mold slightly. Remove excess solution to make the surface of the casting as flat as possible.
STEP 4. Remove the casting from the mold.
After about 40 minutes, you can remove the casting. To do this, gently stretch the mold at the edges and then, turning it over, remove the mold from the casting. If the figure does not come out, gently tap the mold against your palm. The casting should be smooth and sturdy.
STEP 5. Paint the figure.
Now comes the most interesting part – painting! You can start this 2–3 hours after casting the figure. However, it is better to be patient and do this the next day, allowing the plaster to dry completely.
TIP. As a final touch, you can apply a thin layer of clear varnish to the painted figures.
STEP 6. Attach the magnets.
Now you can attach the magnets to the figures. The set includes magnetic tape with an adhesive layer protected by paper. For convenience, the magnetic tape is already divided into squares. The number of squares per figure is 6–8. If the figure does not hold well enough, you can stick a second layer of magnetic squares.
TIP. To ensure that the magnet adheres better to the plaster figure, it is recommended to cover the back of the figure with varnish or PVA glue and let it dry.
Age restrictions: 4+
EAN: 4606088049632
Size: 173х124х44 mm
Weight: 266 g
ID: 1746091
In stock
€ 5.04
Will be delivered to United States on :
Unfortunately, we are currently unable to deliver orders to your region.
In stock
€ 5.04
Will be delivered to United States on :
Unfortunately, we are currently unable to deliver orders to your region.
Bestsellers





Bestseller
€ 12.19
In stock
Kanashibari. Until the Last Lantern Goes Out. Volume 1
Ангелина Шэн, Вероника Шэн